Wednesday, December 31, 2014

First Glance || Blue Apron Box

I have not been so excited to see the UPS guy as I was today. 

After seeing a bunch of ads, I decided to give Blue Apron a try.  Blue Apron is a delivery service that sends you a box of pre-portioned meal ingredients, with recipes (including step-by-step photos), to make three dinners for two people (there are also plans to feed four or six people and you can opt for vegetarian meal only plan). You also have line-of-sight to the expected delivery day/time frame ~ so you can pick a window that fits your schedule. You have access to the following week's menu a week in advance so that you can decide if what is being offered looked appealing before ordering.

Our meals arrived neatly packaged in a cardboard box lined with ice packs to keep the contents fresh (pictured above) for a few hours. The veggies are individually bagged, meats are vacuum sealed, spices are portioned out, and everything is clearly labeled to avoid any confusion. Packing the contents away in the fridge, I was impressed with the quality of what was sent (in some instances better than what I can find readily in my local store). Each recipe was well documented and every single ingredient (except for olive oil, salt, and pepper) is included in the box.

Couple of cautions ~ 

  1. Currently there are no meal plans past 'meat and fish' or 'vegetarian'. Watch the menu carefully for any food allergies or preferences before letting your order drop.
  2. Price point...this works out to $10 per serving per person. I suspect that I could source some of this locally cheaper but, you are paying for the convenience factor. As I reviewed the recipes and compared to the contents of the box I got, the portions seem to be reasonable and I doubt there will be any leftovers.
While the dishes don't seem to be overly original, there are some ingredients and combinations here that I might not normally bring into the house. Additionally, this is a great opportunity for me to hone some of my culinary design skills (my knife work sucks for example).  Expect to see updates here on the dinners we create.

Tuesday, December 30, 2014

Product Review || Chef’n Looseleaf Kale and Herb Stripper

Confession time ~ I am something of a 'gadget guy'; so it should not surprise anyone that this little tool caught my eye when I was in Sur La Table the other day.

When using fresh herbs (think rosemary, thyme, etc) part of the prep work involves removing the leaves (which have the flavor) from the steams (which are not good eats).  Enter the Chef’n Looseleaf Kale and Herb Stripper (roughly $8), which promises to "speed up time-consuming prep tasks".

Does it work? Yes. Does it save me a whole lot of time? Not enough to make me feel like I got my bang-for-the-buck with this purchase ~ I might feel differently if I had spent half the money. Gets three out of five stars in my kitchen.

Sunday, December 28, 2014

Alder Plank Salmon

Walked into Sur la Table to buy $10 worth of salt but, I walked out with over $60 worth of stuff and the inspiration for tonight's dinner.

Walking through the store, I came across a pre-sanded, 'Alder Grilling Plank' for just $5 (the similar sized cedar plank was double the price). Knowing that I had some salmon fillets that needed to be used up at home, I was a bit excited at the thought of an entree that might resemble my favorite cedar plank salmon. Regardless of the wood, you cannot just throw it on your grill. Be sure to soak in salted water for about an hour before using (I know folks who have done wine or apple cider vinegar but, I haven't).

I created a simple marinade for the salmon using one lemon (score for having a lemon tree in the back yard), three tablespoons of soy sauce, a couple pinches of Hawaiian Alea Salt (also from Sur la Table), and a couple grinds from the pepper mill. Mix together in a bowl and brush on the salmon fillets that you have placed on the 'seasoned' (aka soaked) plank. I also added a few shakes of Black & Tan Gomasio (found at Whole Foods) over the top for taste/texture. With your food on the wet plank, place on a preheated grill over indirect heat (keep a mister bottle of water handy so you can handle any flame flare-ups).  I used the left over marinade to season white and green asparagus spears ~ with also went on the grill. Cooking times for both can vary based on environmental conditions so, cook the fish to 145 degree internal temperature and the veggies roughly 5 minutes on each side. Seriously, this is crazy simple to put together and put in front of the family ~ you just have to pay attention to the food as it cooks.

We plated with some sliced heirloom tomatoes ~ whole dinner Weight Watchers points, based on a 4 ounce salmon fillet size, was just 11 points.

Every other time I have ever done plank-grilling (with cedar) the plank itself was typically charred to the point that an additional use was not possible (even though I followed the same seasoning process I always do). I expected the same this time but, was pleasantly surprised and expect to be able to use this at least two more times before tossing in the bin for recycling. 


Thursday, December 25, 2014

Apple & Carrot Salad

We didn't have many holiday gatherings this year that required us to bring much more than a couple bottles of wine but, we have a couple over the next of days that have us bringing something more substantial.

Hot side dishes are a pain to keep warm so, I am throwing them out as I don't feel like dealing with the logistics of that. Now we've zeroed in on a cold side dish and need to find something that will not likely already be there (I am forever calling 'dibs' on this one), is healthy, easy to fix, and that people will actually want to eat.  I found the solution in an Apple and Carrot Salad that has just a few ingredients and takes just a few minutes to make.

You will need about ten minutes and the following;

  • 3 large, fresh apples (red and green)
  • 1-1/2 Tbsp fresh lemon juice
  • 3 cups uncooked carrots (sure you can 'matchstick' these but, I just bought a bag).
  • 1/4 cup of chives (don't buy the stuff in the jar, buy fresh and chop yourself).
  • 1 tsp sugar (I used Whey Low in lieu of the cane variety).
  • 1 tsp olive oil
  • 1/2 tsp table salt
  • 1/4 tsp pepper (or more) to taste
  • 2 oz of feta cheese, crumbled.

Assembly is easy...
  1. Core, thinly slice, and matchstick the apples. Tim's Tip: place the matchsticks in cold water with a bit of lemon juice added. This will keep what you cut from oxidizing (turning brown) while cut each apple.
  2. Drain and pat dry, place into a a large bowl and toss with some additional lemon juice (to taste ~ prevents oxidization until served).
  3. Add carrots, chives, oil, sugar, salt, pepper, and cheese. Toss to mix thoroughly.

This will serve ten and yields about 3/4 cups per serving. For those of you counting Weight Watchers points, this is just 2 per serving.


Sunday, December 14, 2014

Egg White Breakfast Bites

There is a shift afoot in my household that has changed the dynamic of the expected morning routine.  Don't get me wrong, I am happy to have a promotion that takes me into the office most days and managed to uncover a way to spend 45 seconds making a healthy, hot breakfast during the week.

I made "Egg White Bites" for the first time last week and discovered that these worked pretty well when paired up with a pre-cooked turkey sausage link. Here is what you will need.

Ingredients:

  • Carton of egg whites
  • Olive oil cooking spray
  • Salt, pepper, or your other favorite seasoning
  • Fresh veggies (I used onion and zucchini but, you can use tomatoes, spinach, kale - or just about anything you would put into an omelet).
  • You will also need a mini-muffin pan. You can use a larger one, but it will take longer to cook.

Instructions:
  • Preheat oven to 350 degrees. 
  • Spray each indented section with the olive oil cooking spray so that the bottom and sides are lightly coated.
  • Dice your veggies, I was doing this at the same time I was prepping our dinner so, the food processor came in handy.
  • Add to each indented section of the pan. You can fill as much or as little as you want but, do not pack it too tightly in each section. My tip is to fill to about the halfway point...
  • Fill each section with egg whites. Typically, if you use the mini-tins I find that it will take about one tablespoon of egg whites.  If you filled the section with half veggies, you will see some of them mix with the egg whites as you pour them in.
  • Add seasoning.  At the very least, salt and pepper but, you can use whatever you want. This week, I used a bit of Old Bay (we tend to steer towards the savory side) in the tins.
  • Place in the oven. The mini muffin tins will take 10 or so minutes but, if you use a regular size one then I would suggest you double the time.  Check them at the ten minute mark, if they do not look like the ones pictured below, then give them a couple more minutes.


If you aren't eating these right away, allow to cool before moving to a container and placing in the fridge (which was my end goal tonight).  The end product will last about four days in the icebox.

Reheating is a snap.  Times listed work for my 900 watt microwave - yours will vary based on wattage and how much you put on the plate (I typically go with two Egg White Bites and three Turkey Sausage links).
  1. Line a microwavable plate with a paper towel, put food on plate
  2. Cover with another paper towel (I am honestly not sure why paper towels are so magical in the microwave but, trust me on this so that you can avoid the mess that I ran into one morning last week).
  3. Microwave on high for 45 seconds - enjoy after removing the paper towels...
You can add salsa, hot sauce, whatever you normally would with your eggs in the morning. I am making these up on Sunday night so we are good to go for a 45 second investment during the week (which means this boy can get to the gym before going to the office). For those of you tracking your points in Weight Watchers, this is just three...so not a bad kick start to your morning.


Sunday, November 16, 2014

Egg Whites - A Story of a Healthy Breakfast

Egg Whites, Kale and Turkey Bacon (with bonus Sriracha)
It has been a while since I blogged more than pictures of food I've made on Instragram. After a couple aggressive months of travel, we finally both had a couple days at home. While our Saturday morning ritual is a healthy breakfast at the local "Good Egg" today, was a brunch-free morning and I was up to bat for breakfast.

A healthy breakfast does not take a ton of time, nor should you feel like it should be a tasteless experience that is tolerated for mere sustenance. Look I enjoy the three egg, meat, cheese, bacon omelette with a side of bacon and biscuits and gravy as much as the next person - the reality of my life is that I paid a price for all those breakfasts so changes were in order. On the surface a meal of egg whites and turkey bacon might not seem that great but, it can be - if you layer the flavors. There isn't a whole lot you can do to change turkey bacon, it is what it is, an admittedly sad replacement for bacon (but, in all honesty there is no competition for real bacon).


For the eggs let's start by actually getting some butter into a low medium heat skillet. Add some finely chopped kale (that is what I used this morning), spinach, maybe some pico de gallo - pretty much whatever trips your trigger. 
Saute until cooked, gently add the egg whites to the pan and season with salt/pepper to taste. Watch carefully - there is a fine line between cooked and charred - once they start to set, gentle scramble to keep them from burning to your pan. This plus the turkey bacon is pretty decent but, add a couple swirls of Sriracha sauce and things go to a whole new level.

It isn't the awesome goodness of a three egg heart stopper but, it is only two Weight Watchers points, which means a lot less time in the gym...which, after loosing nearly fifty pounds, has become kind of important to me.

Tuesday, September 2, 2014

Sauteed Kale Recipe

Kale - is not lettuce and it is not spinach.  If I was going to say it resembled another green, leafy veggie; then I would guess that it is closer to cabbage (at least in terms of taste).  Before adopting a Weight Watchers lifestyle, I used to saute this with a thick cut bacon and garlic but, now I do not want the added points for the bacon. Tonight, I found a way to get my Kale and do so for a single point add (instead of the four that my thick cut bacon would cost me).

Here is what you will need;

  • Large skillet
  • Two strips turkey bacon
  • Two tablespoons extra virgin olive oil
  • 1/4 cup water
  • Two cups washed and chopped raw Kale
  • Two cloves garlic
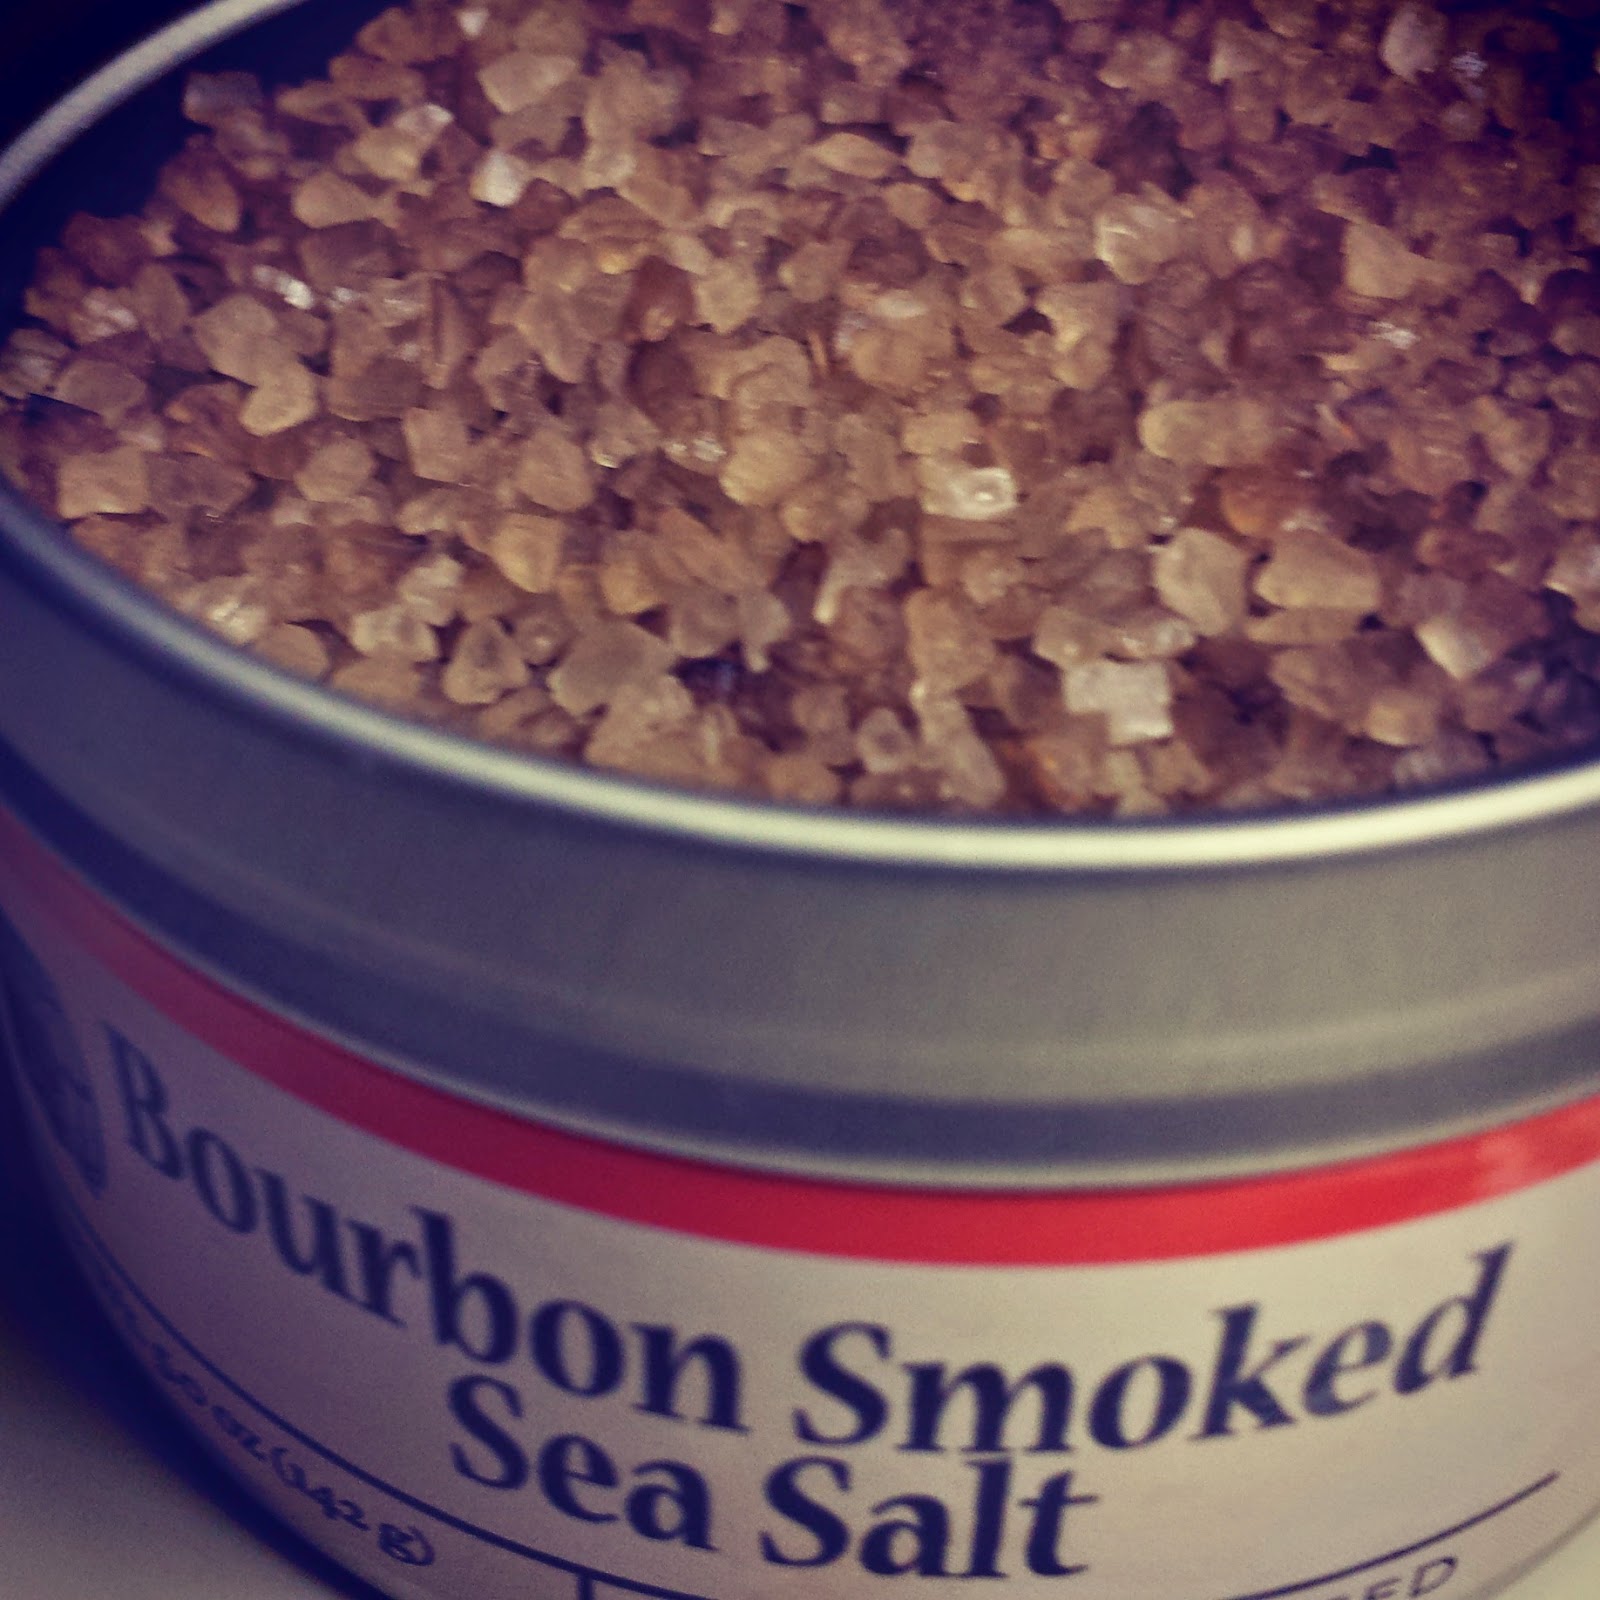
  • Finishing salt - in my case it was a bourbon smoked salt that I picked up over the weekend while in Kentucky.
Dice the garlic and turkey bacon. Heat one tablespoon of the oil in the pan. Add the Kale once the oil is up to temperature, tossing with tongs until bright green (give it about a minute). Reduce to a medium-low heat add the water and cover, stirring occasionally, until the Kale is tender (about 12 to 15 minutes). Push the Kale to one side of the skillet and add the remaining oil to the empty side of the pan. Cook the garlic and bacon in the newly added oil until fragrant (typically 30 to 60 seconds). Mix both sides of the pan and add a couple pinches of finishing salt (in this instance, the salt replaces what is "missing" since we did not use pork bacon).  Others will add red-wine vinegar - personally, I don't like the taste but, if that is your thing then go for it.

I served with a dry-rubbed, grilled chicken breast and some whole grain, Spanish style rice.


Monday, August 11, 2014

The Spice of Life...

Variety might be the spice of life but, there are a few, basic spices that I like to use on a regular basis.  Excluding specialty spices that you might need for a certain dish, these will cover most of your bases and are pretty shelf stable (yes, that jar of oregano you have had since 2002 should probably be replaced)...

Salt - you might not think it is a big deal but, you are missing a bit of the boat if you are using standard table salt in your cooking. Go and get a decent sea or kosher salt.  I like flakes but, I do not do a lot of baking. If you are a baker, then you will need a finer grain rather than rougher cut version.

Pepper - Buy whole pepper and a pepper grinder. The stuff that is pre-ground has actually lost much of the flavor profile. Grind what you need, when you need it, to get the most bang in your cooking.

Finishing Salt - Much different from your standard salt we shared above, this favored version comes in many varieties and can add a depth of flavor that you might not otherwise find.  Try one out and see how you like it - the Smoked Paprika version I use a lot on chicken, turkey burgers, and on couscous.

Cavender's Greek Seasoning - If I could only use one product to flavor my food, this would be it. I use it on everything from salads, to cottage cheese, to steaks, and beyond. Made in Arkansas, you can get it in a Wal-Mart near you or order directly from the family online.

Zatarain's  Creole Seasoning - For times when you want a bit more kick than what Cavender's will provide, this is a great stand in for rice, shrimp, chicken, and chili.

Old Bay Seasoning - If you cook fish, then you need this in the cabinet. Other stuff can come close but, there is no replacing what this can do to add flavor to that Tilapia fillet. I recently discovered their garlic and herb version (which I happen to like a lot) - there are a couple of other iterations but, the standard will never do you wrong.

Garlic & Herb Dry Rub - We eat a lot of chicken and pork, this is excellent to add flavor prior to grilling.  Not as messy as a wet sauce, this also helps to lock in flavor/juices during cooking.


Sunday, July 20, 2014

English Muffin Bruschetta

The two points must be because this is too easy...

Okay, corny joke aside we tried a recipe that we saw in the Weight Watchers magazine this month.

3 Tbsp fresh tomatoes
1/2 tsp Olive oil
Pinch of salt
Pinch of pepper
1 tsp of fresh basil
1/2 light English Muffin
2 Slivers of diced garlic

Combine the tomato, oil, salt, garlic (WW suggests garlic salt but, I like actual diced garlic better), and pepper in a small bowl. Garnish with basil and spoon the whole thing over a toasted English Muffin half (we used a light, multi-grain version).  Overall, good taste, very quick to whip up and a perfect cap with the Italian style turkey sausages I cooked on the grill. When I do this over, I am going to toast this muffin a couple of minutes more.

Tuesday, July 15, 2014

Tipping the Scales in the Other Direction...

Image Courtesy of: rx4betterhealth.com
Each year my employer runs a wellness program - with this year's effort being notable for not being so heavy handed and guilt ridden. Given my size, I was somewhat surprised when the Admin from our Human Capital team reached out yesterday and asked me to share my story.

I am sharing here so that you have context for my personal choice to opt for picking real over faux (or fast) food...   

I am shocked when I see pictures of myself – the self image does not sync up with what my eyes see. This year, I decided that I can either sit back and wait for some magical change to happen or I can do something constructive to align the image in my head with the one that you see. Those constructive actions can be broken down into three steps...

Step one - I realized that by the time I get in the car, drive to the fast food joint, get my food, and drive home; I could actually just fix something fresh and healthily. As a result, I have rediscovered that I love cooking.  Also, there is zero junk food in my house - a unconditional key to being successful is not having it within easy reach.  When start to dream about that Snickers bar I just remind myself that, “I know what that tastes like but, I do not know what my goal weight feels like” (quote credit for that one goes to Rose).

Step Two - I joined Weight Watchers with my Fiancée.  I could not do this successfully on my own. Together, we keep each other accountable and are chasing our weight loss goals. We prop each other up on the bad days and celebrate the successes.  I have found the Weight Watchers eTools and overall points tracking system easy to do and have been able to sustain their use over the last 40 days.  They also coach you to look at your loss in 5% increments (instead of focusing on a huge number) – as I write this, I can share that there is 5% less of me than there was at the start of June. That is a huge motivator as I roll up my sleeves and fight through the next five percent.

Step Three - You cannot lose weight effectively until you get off the couch and exercise.  For me, that has taken the form of swimming four to five times per week. I started out slow (four laps, rest, four more laps, etc) but I am now up to a half mile, without stopping, each time I get in the pool. DVR that TV show and make this a priority in your life and it will become routine.


I will not kid you, this is not an easy journey but, I ate it so I own it.  Make healthy food choices, find a support system, and get off the couch – you will see results and you will believe that you can do it.”

Quick and Dirty Steak Prep...

Image Courtesy of Pike Valley Farm Foods
Sometimes there is a meal that you just crave. That was definitely the case tonight. Maybe it was the new grill, perhaps it was the fact that I have not had a decent steak in a long time, or the fact that I did not eat a big lunch (instead of working from home, I went into the office today for a meeting). 

This is a pretty simple meal. The rice from a box and flavored with two each Dorot Garlic and Basil cubes.  The asparagus from a bag (before you judge me for this, remember that I do not cook in a five star restaurant). What I spent the most time on was the steak.

Be sure to start with a decent cut of meat with a good amount of marbling. Personally, I think the strip steak is the best as it comes from a muscle that does not do a lot of work (therefore it is particularly tender). I didn't marinate the meat before leaving for work today so all the prep work happened while the grilled warmed up. If I had been smarter about it, I would have used a ziploc bag and let this marinate in the fridge during the day...

Just 16 Points for Fellow Weight Watchers folks
Quick and Dirty Steak Prep

  1. Use a dinner fork and pierce each side of the steak(s).
  2. Rub Lea & Perrins Worcester Sauce into both sides of the steak. 
  3. Season both sides with Kosher Flake salt and ground pepper (to taste).
  4. Place steak on very hot grill - sear one minute on each side. Reduce heat and cook approximately 5 minutes per side (can vary based on your grill).
  5. In a small saute pan, melt 2 tablespoons unsalted butter. Add onions and saute until golden brown.
  6. Cook steak to internal temperature of 140 degrees - remove and allow to rest for 10 minutes. 
  7. Plate steak last and spread onions/butter mixture over the top of the steak.

Enjoy - I know we did...
New York Strip Steak, schezwan asparagus, and garlic basil brown rice.

Sunday, July 6, 2014

Healthy Shrimp Tacos

Made shrimp tacos tonight using cilantro and red chilli peppers. Garnished with broccoli slaw, a fire roasted salsa, and served on a whole wheat tortilla. Served with a cajun spiced couscous.

Friday, June 27, 2014

Watermelon Feta Salad

Crazy simple stupid easy...

  1. Buy watermelon, a block of firm feta cheese, and some fresh mint.
  2. Chop into small pieces
  3. Toss pieces in bowl - mix together
  4. Eat
Told you - crazy, stupid easy stuff to beat the heat.


Sunday, June 8, 2014

Chicken Salad Stuffed Tomato

An 8 point Weight Watchers Lunch (per stuffed tomato)
Irony - I love to cook, I hate to grocery shop. Came home from the adventures of running errands and shopping for the week to decide that I wanted a quick cool lunch.  This time of year, here in Phoenix, it is all about not turning on the stove in the middle of the day.

Here is what you will need;

  • Large tomato - I like a beefsteak or slicing one.
  • Canned chicken - you can use all white meat but, a mix of white and dark will give you more flavor.
  • Light mayo or Miracle Whip.
  • Celery stalk
  • Shredded Cheese
  • Seasoning - I opted for my old standby, Cavenders.
Open and drain the chicken completely.  I even go so far to blot dry the meat after draining. Empty into a mixing bowl.  Add the mayo/Miracle Whip and seasoning into the bowl. Dice the celery into fine pieces and add to the bowl.  Mix thoroughly until all ingredients are integrated. Carefully slice the top off the tomato and core out the inside. Personal preference if you decide add the cored tomato guts to the bowl with the chicken or discard. Spoon the chicken salad into the tomato shell and sprinkle with the cheese.

This will take maybe five minutes but, it is worth it...

Tuesday, June 3, 2014

Texas Barbecue Chicken with Couscous Stuffed Red Peppers and Basil Garlic Crostinis

A colleague that I assigned to an implementation in Ennis, Texas brought me back some really nice sauce that we decided to try tonight. The finished product was pretty awesome - if I say so myself.


Texas Barbecue Chicken - what you need...

  • Boneless skinless chicken breast
  • Bottle of barbecue sauce. This was from Texas  so I dropped that in the name but, really you can use any dang sauce you like.
  • Ziploc bag

Place chicken breast in Ziploc bag and pour sauce into it. Place sealed bag in fridge for a few hours (I did this early in the morning and let it marinate the whole day). I skipped a step this morning and didn't flatten the chicken breasts - so I strongly suggest that you do this before bagging and tagging (doing this helps the chicken cook evenly).

Image Courtesy of seriouseats.com
When ready preheat grill and place marinated chicken breasts on the upper grill grate.  It only takes a few minutes per side, so keep an eye on it or you will wind up with dry chicken. Cook to an internal temperature of 165 degrees. Give it a couple of minutes to rest before plating.


Couscous Stuffed Red Peppers
Swung by the local fresh & easy and grabbed a prepackaged offering that comes in a ready to use grilling pan.  Unwrap and put on the grill - that is it, nothing complicated.  If you are in a time crunch but, want a filling side dish then this is the way to go.  While there is some great layering of flavor in this, I have to believe that if you spent a few more minutes you can get a customized result that blends the flavors your want (garlic, basil, parmesan, feta, whatever).  Next time I am going to give fixing this myself a whirl and I will let you know how it goes.


Basil Garlic Crostinis - what you need...
  • Fresh baguette
  • Butter
  • Garlic
  • Basil
  • Seasoning of Choice - mine is Cavender's
The method that I am sharing works for me.  I like the texture of the finished result but, crostini snobs out there will tell you that this isn't a "true crostini. Personally, I am not wanting something that will disintegrate the first time you bite into it (plus, this is my blog). You have been warned - read on if you want a soft crispy product. If not, then there are a zillion other recipes out there for you.  I will leave you to decide now...

Thanks for sticking with me - it really means a lot that you have bought into my vision.  Move oven rack to near the top of the oven and pre-heat broiler to 275 degrees. Melt butter over medium heat in sauce pan. Add garlic and basil to taste.  Once all ingredients are combined/melted, add seasoning to taste.  While the butter is melting, slice the baguette into 1/4" portions. Place on ceramic baking sheet. Brush/spoon/pour melted butter mix over the baguette slices.  Place on top rack of oven and cook for five minutes. If yours isn't a light golden brown, then leave it there for another minute but, keep an eye on it. There is a fine line between yummy bread product and burnt toast.


Sunday, June 1, 2014

Marinated Chicken Breast with Garlic Basil Parmesan Couscous and Peas (+ bonus tip)

It all started because I found an unopened bottle of salad dressing that was going to expire in the next couple of weeks.  That pesky bottle of red wine balsamic dressing became the genesis of a marinade that resulted in one of the most succulent pieces of poultry I have ever enjoyed.

Just place your boneless, skinless chicken breast in a large Ziploc bag and pour the entire bottle of dressing into the bag.  Seal and place in the fridge for about six hours. When you go to grill it, you will find that the chicken has absorbed about 3/4 of the liquid in the bag.  Grill as you normally would - be sure to cook to 165 degrees.

Couscous is simple and a completely different texture from rice (I like it better).  Just bring 1-1/4 cups of water, 2 teaspoons of olive oil, 2 Dorot cubes of basil, 2 Dorot cubes of garlic, and the packet of spices to a boil. Once boiling, slowly stir in the couscous, cover and remove from the heat.  Allow to sit five minutes - fluffing with a fork before serving.  Peas are steam simple - I won't insult your intelligence by pretending I did anything special to these.


I promised you a bonus tip and I don't want to disappoint.  To keep your leafy greens and sliced veggies fresher, longer - place into a Ziploc bag with folded paper towel. You can also place into a bowl with a paper towel caught between the lip of the bowl and lid. Store in the fridge upside down for up to five days.  Be sure to replace the paper towel anytime you take product from the container.


Simple, Healthy Summer Lunch

With the mercury now routinely climbing over 105 here in Phoenix we cooked a simple lunch that didn't drag anymore heat into the house.

While I was grilling off four chicken breasts (for our lunch salads this week), I threw a couple seasoned Jennie-O turkey breasts on the upper deck of the grill.  While the first side was grilling, I sliced a beefsteak tomato and seasoned with Cavender's (If you have no other spice in your home - then have salt, pepper, and this. I cannot tell you enough about how amazing this stuff is).  After flipping, I cleaned some celery hearts and spread some soft cream cheese in them.

It was just that simple - no heat added to make the A/C work harder and a heck of a lot healthier than was you can get at burger doodle.

Monday, May 5, 2014

Product Review | Wild Oats - Smoked Bacon Spinach Salad

My workday started from home but, shifted to needing to be in the office for a couple of meetings. I dashed out of the house before packing a lunch for myself so a stop to fresh and easy was in order.

If you haven't been in a while, then the evolution you will see in the store might be a bit jarring.  Personally, I find it handy for quick pit stops like I had this morning (even though I think the beverage cooler at the back of the store makes me think I am in a liquor store).  The grab and go stuff is all upfront, right by the register (exactly where it belongs) and there are a few new additions that you will want to pay attention to.  You will notice several organic offerings branded as "Wild Oats", you can only get the sandwiches, salads, and eggs (product review coming later this month) at your local fresh and easy store.  Each of these offerings is made to be sold within 24 hours. For example, the salad I had today, was made yesterday, delivered last night, and placed on the shelf this morning.  There is a limited supply, so swinging by the store during your morning drive time is perfect.  Right off the bat you will see a couple of differences between the Wild Oats products and the standard sandwiches/salads; the "eco-friendly packages and the slightly higher price. This morning, I picked the Smoked Bacon Spinach Salad for the brown bag lunch meeting I needed to be onsite for.  I will say, this was definitely fresh and and on par with what I would fix for myself at home. Contents were exactly as advertised and I was actually filled by the eight ounces of food.  Was it worth the extra money - in this instance yes. If I was on a restricted diet, had an urge to have organic food, and needed it in a grab and go format (which I have not seen anywhere else); then the slight up-charge is well worth it.

While I am on a product review rant, I am going to get on my soap box and complain about something I did see in the store at Kyrene and Baseline.  Back when the chain launched, they had a "clearance" cooler. You got used to walking in the store and checking the cooler before you started shopping. It was okay, but horribly inefficient for traffic flow.  After the Yucaipa buyout, these stores had switched to keeping clearance items in their original locations and doing away with the separate location.  So, if you were buying steak, you would see the marked down trays in with ones that weren't discounted - and could decide what worked well for you.  Clearly this store didn't get (or care about) that memo and are using a section that is clearly designed for something else (just look at the signage in the photo).  Since this is the store that is the easiest for me to swing into on my way home from the office, I hope it is something they correct in the short term future (especially since this looks like a section that is supposed to help me put together a complete meal quickly).


Sunday, April 27, 2014

Simply Done | Pork Chops with Caramel Citrus Glaze


This blog is not about travel but, travel figures into the story of this meal. We spent the weekend in California to catch a BNL concert. On the way home, we decided to take the road less traveled and were rewarded with the amazing vista above Palm Springs.  As the miles passed beneath our tires we knew that we were one step closer to the "normality" of home - picking lemons from the tree (the second such harvest, if you want lemons, give me a shout), grocery shopping, laundry, and dinner decisions.  Before we hit the state line, I had already decided that I had hit my limit of dining out so, I would need to cook tonight.

Standing in our local Fresh & Easy store, I pondered our options.  Thanks to whatever unholy winds blew through the Phoenix area while we were gone, grilling was really out of the picture (I would have to clean it before I cooked out there and I just did not feel like it) so, I was gravitating towards doing something in the oven.  We haven't had pork lately so I was leaning that way and then I saw the, "Simple Pork Chops with Caramel Citrus Glaze" in the meat section and we were off to the races.  With an ingredient list that I can actually pronounce and understand, simple oven instructions, we had a foundation of a meal that we served with parmesan roasted potatoes and green beans.  I cannot blame the chefs at the store for their decision (I would rather have under-seasoned than over-seasoned), but I felt this was a little bland and I added some Cavender's to add some depth of flavor.  My only other knock was some that my chop had a lot more fat on it than I would like but, a knife fixed that once it was pulled from the oven.  Though I applied a couple of tweaks, this was a great pick to keep us out of another restaurant.

I have a bonus product review for your consideration. I have said for years to cook meat to temperature and not time.  For years I have used a Polder probe thermometer for bigger items but, it is a pain the butt to use on smaller things (like pork chops).  I found a simple, cost effective solution in the OXO Good Grips Digital Instant Read Thermometer.  Though you should not leave this in the meat while it is on the grill or in the oven (the plastic housing of the digital readout will melt), it is a great tool to quickly check where you are at.  Caution, this is not really an "instant" unit, but you will see the numbers climb and stabilize within about five or so seconds (which should work nicely for what you need it to do). 

Wednesday, April 16, 2014

Bacon Wrapped Chicken Breasts Stuffed with Garlic Basil Cream Cheese

Kauai - wonderful beaches, an excellent place to get away from your mainland cares, and someplace that has chickens wandering all over the place.  Since returning, I have been on a eat all the chicken I can get my hands on kick.  Yes, this is a thinly veiled attempt at revenge for having to listen to them crow/cluck/annoy us at every hour of the day.

I also firmly believe that bacon makes everything better and tonight's entree is a result of that belief and a willingness to experiment with the stuff that we had in the fridge.

Let's start by preheating your oven to 400 degrees and gathering the following ingredients;
  • Boneless chicken breast (one for each person)
  • One tablespoon of cream cheese per breast
  • One clove of garlic per breast (in my case that is a Dorot garlic cube in place of each clove)
  • Couple of basil leaves (in my case two Dorot basil cubes).
  • One piece of raw bacon per breast (I like the thicker cut)
  • Wooden toothpicks.

Directions
  1. Separate the needed amount of cream cheese into a bowl
  2. Mince, press or finely chop the garlic and basil. (upper left)
  3. Stir into the cream cheese - Tim's Tip, allow the cream cheese to soften a bit outside of the fridge to make this easier.
  4. Flatten or butterfly (personally, I prefer to flatten them) the chicken breasts.  If you have it, you can use a clean mallet to make this easier. The fact that you can get rid of a bit of aggression is my bonus gift to you. (upper right)
  5. Spread the desired amount of cream cheese onto one face of the flattened chicken breasts.
  6. Gently roll the breast up starting with the smaller end. Be sure that it is even on both sides.
  7. Take your piece of bacon and starting at one side of the breast, wrap it tightly around the chicken. Secure the bacon with a toothpick (again, do not use a plastic toothpick - that will not be good eats), be sure to remember how many you put in so you can pass the pop quiz remembering to remove them all) prior to serving. (lower right)
  8. Place in either a small baking dish or on a baking sheet. Personally, I use a ceramic sheet, lined with parchment paper.
  9. Place on the center rack of the preheated oven for 35 to 40 minutes, until the chicken reaches an internal temperature of 165 degrees.
  10. Clean all the stuff that the chicken touched or even thought about touching. I mean it, do not skip this step - I cannot stress how important hot water, lots of soap and Clorox bleach wipes are to avoid revenge of the chicken. If you do not believe me then, listen to the US Government - they never lie... (lower left)
  11. When the chicken is done (juices run clear) you can move the chicken up to a higher rack in the oven and turn the broiler on, leaving the oven door open a bit. This will help the bacon crisp up a bit. Once your bacon gets to the amount of crispy yummy you want, remove from the oven and let cool for a few minutes before serving.
There you go - well worth the prep time and my yummy revenge for all the racket while in paradise...


Sunday, March 2, 2014

Simple Sunday Lunch and Special Seasoning

As we get closer to our Kauai trip, we have re-embraced a carb free diet.  Sunday breakfast was poached eggs, bacon, and cheese but, lunch was all about handling a craving that I have had for a burger. Burgers as most Americans know them require buns and buns, unfortunately, have carbs...

There is a way around this and we gave it a go for lunch today.  The last thing I was to do is work hard today (killed myself yesterday and am not inclined to apply myself today). While the turkey burgers were on the grill (lightly seasoned of course), I grabbed some cheese, leaf lettuce and tomatoes from the fridge.  Slice the tomatoes, salt lightly and place on your plate.  Add whatever condiments you want to one face of the lettuce leaf (mayo in my case). Once off the grill, allow the patties to rest for three or so minutes. Add the cheese (cheddar in this instance) and wrap in the lettuce leaf.

On another subject, I found a steady supply of Cavender's seasoning at Wal-Mary of all places.  y father used to use this on the London Broils he would grill but, I have come to love it on just about everything you might use salt on. It adds a depth of flavor that salt alone cannot bring.  If you are watching your salt intake, there is a salt free version that isn't too bad...

Thursday, February 27, 2014

Nutrition Label Makeover

Reading nutrition labels can be confusing and involve a bit of serving size conversion.  Today, the Food and Drug Administration (FDA) announced that they would like to make some changes - I am all in support of what they propose.

The FDA is proposing several changes to the nutrition labels you see on packaged foods and beverages. If approved, the new labels would place a bigger emphasis on total calories, added sugars and certain nutrients.

The most visible change is that calorie counts are bigger and bolder, to give them greater emphasis. In addition, serving sizes start to reflect the way most of us really eat. The current serving size is a half-cup. Under the proposed new label, the serving size would become 1 cup. A 20-ounce bottle of soda would be labeled as one serving. And with that, the calorie count at the top would come closer to reality.

The FDA says it will accept public comment on the proposal for 90 days.  For more information, visit the FDA website.

Wednesday, February 26, 2014

Trying Turkey "Steak"

Decided to try something different this evening for dinner...Turkey Breast "Steak". I will confess, I nearly passed it by. The "containing up to 12% of a flavoring solution" note on the label scared the hell out of me.  That solution has ingredients that I am pretty sure that I need a chemistry degree to understand what they are...
Regardless, we decided give it a whirl. While the grill was pre-heating to medium heat, I opened the package and drained away all the fluid that was likely generated in close quarters to the Palo Verde Nuclear Generating station.  For extra measure, I blot dried with a paper towel before placing on the grill. Cook ten minutes each side on medium heat.  I would suggest that you add a bit of salt and pepper as well.  The taste of the cooked product was not bad, i just have an issue with food having faux food components.
Better yet, avoid the student loans for the chem degree and stick with something that has 0% of a flavoring solution.